Tutorial - Integrate Sketchfab viewer with Elfsquad

In this tutorial I will show you a basic integration of the Sketchfab viewer with Elfsquad.
1. Embed Sketchfab viewer
Let's start with creating creating a new HTML page that embeds a Sketchfab viewer. This sample code can also be found on the official Sketchfab for Developers Viewer API page.
<!DOCTYPE HTML>
<html>
<head>
    <meta charset="UTF-8">
    <meta name="viewport" content="width=device-width, initial-scale=1">
    <title>Sketchfab Viewer API example</title>

    <!-- Insert the Sketchfab viewer script -->
    <script type="text/javascript" src="https://static.sketchfab.com/api/sketchfab-viewer-1.12.1.js"></script>

    <style>
        html, body{
            margin:0;
            padding:0;
            overflow: hidden;
        }
        iframe {
            border:none;
            height:100vh;
            width:100vw;
        }
    </style>
</head>

<body>
    <!-- Insert an empty iframe with attributes -->
    <iframe src="" id="api-frame" allow="autoplay; fullscreen; xr-spatial-tracking" xr-spatial-tracking execution-while-out-of-viewport execution-while-not-rendered web-share allowfullscreen mozallowfullscreen="true" webkitallowfullscreen="true"></iframe>

    <!-- Initialize the viewer -->
    <script type="text/javascript">
        const iframe = document.getElementById( 'api-frame' );
        const uid = 'cee9dd8f490c47469d2a4e64f99e8056'; // Replace with the ID of your model.
        const client = new Sketchfab( iframe );
        let sketchfabApi;
        client.init( uid, {
            success: function onSuccess( api ){
                sketchfabApi = api;
                api.start();
                api.addEventListener( 'viewerready', function() {

                    console.log( 'Viewer is ready' );

                } );
            },
            error: function onError() {
                console.log( 'Viewer error' );
            }
        } );
    </script>
</body>
</html>
Now you should be able to open the HTML file in your browser and see your 3D model:

2. Serve through web server
In order to be able to embed the viewer as a third party visualization within Elfsquad, the newly created HTML page needs to be served through a web server. For this tutorial it is sufficient to use localhost.
From within the folder in which you created the HTML file type the following command:
python -m http.server 8000
Now if you navigate to http://localhost:8000, you should see your page being served.
3. Embed in Elfsquad
Now that we have a web server running, we can embed the viewer in Elfsquad. Within the Elfsquad EMS navigate to the step editor of the model you want to embed the viewer in.
Create a new step and select the Type "Third party visualization". In the "Third party visualization URL" field enter the URL of your HTML page. In this case, it would be http://localhost:8000.

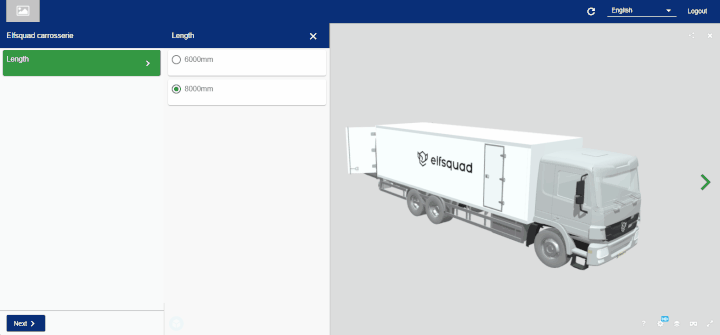
Now hit save and you should see your 3D model being embedded in Elfsquad.
4. Listening to configuration changes
In order to be able to react to configuration changes, we need to add a listener to the viewer. This listener will be activated in the viewerReady event callback.
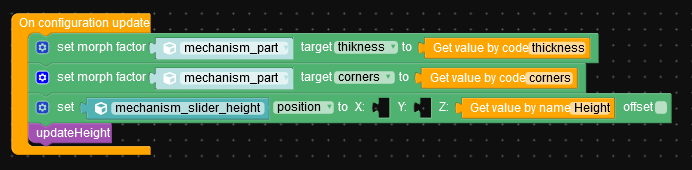
Update the viewerready event listener to first retrieve a node map of the model. This node map will be used to identify the parts of the model that need to be shown or hidden. Then we will call the activateConfigurationUpdateListener function that will add the listener to the page.
let nodeMap = null;
client.init( uid, {
    success: function onSuccess( api ){
        sketchfabApi = api;
        api.start();
        api.addEventListener( 'viewerready', function() {

            api.getNodeMap(function(err, nodes) {
                if (!err) {
                    nodeMap = nodes;
                    activateConfigurationUpdateListener();
                }
            });
        } );
    },
    error: function onError() {
        console.log( 'Viewer error' );
    }
} );
Now we can define the activateConfigurationUpdateListener function. This function will be called when the viewer is ready and will add a listener to page that will be activated when the configuration changes. The listener will then call the updateViewer function with the new configuration as an argument.
function activateConfigurationUpdateListener() {
    window.addEventListener('message', function(e){
        if (e.data && e.data.name == 'elfsquad.configurationUpdated'){
            updateViewer(e.data.args);
        }
    });
}
Now we can define the updateViewer function. This function will be called when the configuration changes and will update the viewer with the new configuration.
For this example I will recursively iterate over all the features in the configuration and based on whether the feature is enabled or not, I will either show or hide the corresponding part of the model. This is just an example and you can implement any logic you want here.
function updateViewer(configuration) {
    const stack = configuration.steps.map(step => step.features).flat(1);

    while(stack.length > 0) {
        const current = stack.pop();
        for (let f of current.features) stack.push(f);
        if (!current.code) continue;

        const ids = Object.values(nodeMap)
            .filter(node => node.name == current.code)
            .map(node => node.instanceID);

        for (let id of ids) {
            if (current.isSelected) {
                sketchfabApi.show(id);
            } else {
                sketchfabApi.hide(id);
            }
        }
    }
}
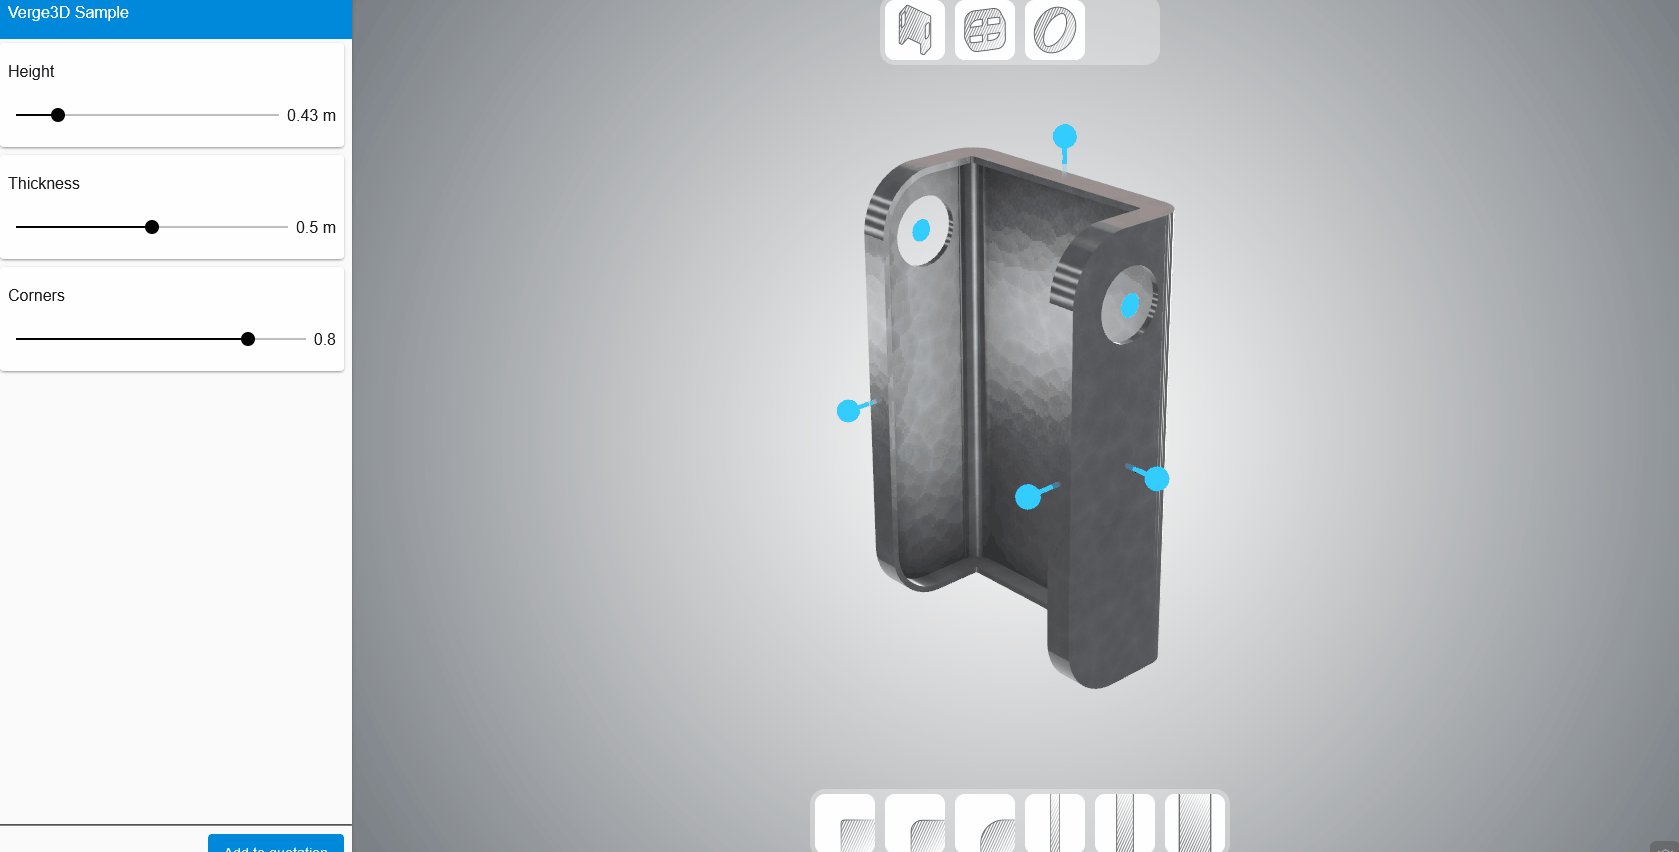
If you mapped the feature codes to the corresponding parts of the model correctly, you should now be able to see the model update when you change the configuration in Elfsquad:
5. Initialize with configuration
Now you may have noticed that the model is not initialized with the configuration. This is because the updateViewer function is only called when the configuration changes. In order to initialize the model with the configuration, we need to trigger the configurationUpdated event once manually within the viewerready function when the viewer is ready.
After the activateConfigurationUpdateListener call add a postMessage call to the top window. This will trigger the configurationUpdated event in Elfsquad and the model will be initialized with the configuration.
api.addEventListener( 'viewerready', function() {
    api.getNodeMap(function(err, nodes) {
        if (!err) {
            nodeMap = nodes;
            console.log('nodeMap', nodeMap);
            activateConfigurationUpdateListener();

            window.top.postMessage({
                name: 'elfsquad.triggerConfigurationUpdated'
            }, '*');
        }
    });
} );
6. Result
The final code should look like this:
<!DOCTYPE HTML>
<html>
<head>
    <meta charset="UTF-8">
    <meta name="viewport" content="width=device-width, initial-scale=1">
    <title>Sketchfab Viewer API example</title>

    <script type="text/javascript" src="https://static.sketchfab.com/api/sketchfab-viewer-1.12.1.js"></script>

    <style>
        html, body{
            margin:0;
            padding:0;
            overflow: hidden;
        }
        iframe {
            border:none;
            height:100vh;
            width:100vw;
        }
    </style>
</head>

<body>
    <iframe src="" id="api-frame" allow="autoplay; fullscreen; xr-spatial-tracking" xr-spatial-tracking execution-while-out-of-viewport execution-while-not-rendered web-share allowfullscreen mozallowfullscreen="true" webkitallowfullscreen="true"></iframe>

    <script type="text/javascript">
        const iframe = document.getElementById( 'api-frame' );
        const uid = 'cee9dd8f490c47469d2a4e64f99e8056';
        const client = new Sketchfab( iframe );
        let sketchfabApi;
        let nodeMap;
        client.init( uid, {
            success: function onSuccess( api ){
                sketchfabApi = api;
                api.start();
                api.addEventListener( 'viewerready', function() {

                    api.getNodeMap(function(err, nodes) {
                        if (!err) {
                            nodeMap = nodes;
                            console.log('nodeMap', nodeMap);
                            activateConfigurationUpdateListener();

                            window.top.postMessage({
                                name: 'elfsquad.triggerConfigurationUpdated'
                            }, '*');
                        }
                    });
                } );
            },
            error: function onError() {
                console.log( 'Viewer error' );
            }
        } );


        function activateConfigurationUpdateListener() {
            window.addEventListener('message', function(e){
                if (e.data && e.data.name == 'elfsquad.configurationUpdated'){
                    updateViewer(e.data.args);
                }
            });
        }

        function updateViewer(configuration) {
            const stack = configuration.steps.map(step => step.features).flat(1);

            while(stack.length > 0) {
                const current = stack.pop();
                for (let f of current.features) stack.push(f);
                if (!current.code) continue;

                const ids = Object.values(nodeMap)
                    .filter(node => node.name == current.code)
                    .map(node => node.instanceID);

                for (let id of ids) {
                    if (current.isSelected) {
                        sketchfabApi.show(id);
                    } else {
                        sketchfabApi.hide(id);
                    }
                }
            }
        }

    </script>
</body>
</html>
7. Next steps
Now that you have a working integration, you can start to customize it to your needs. Here are some resources you can use to get started: